
Border: Supply Room / Customs Inspection (1F)
Border · 1F · Customs
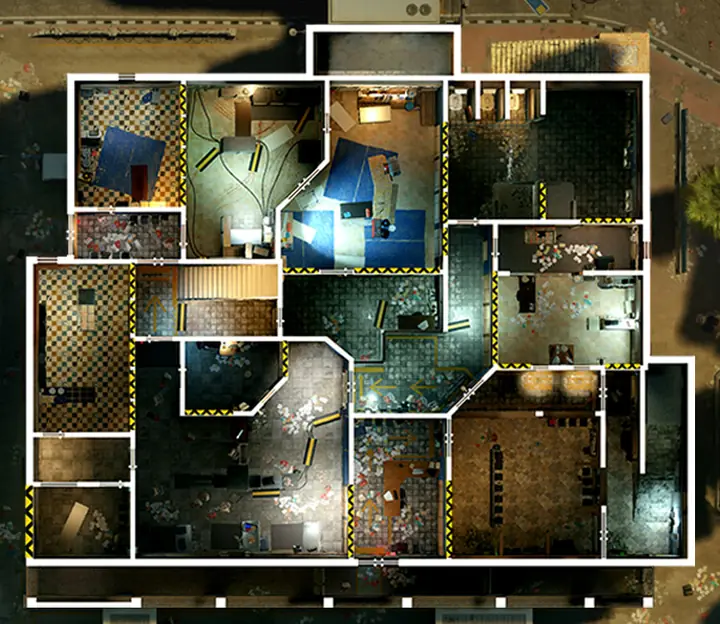
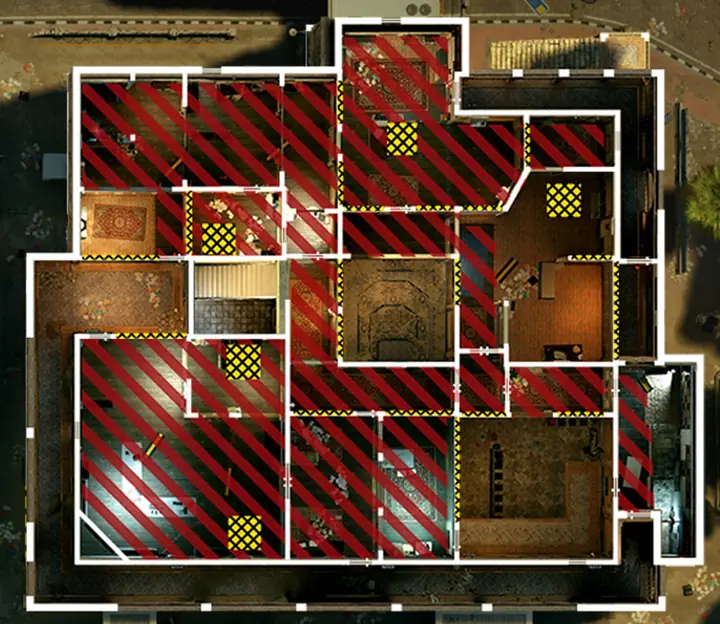
Supply Room / Customs Inspection is a first floor bomb site on Border, planting in Customs. Attackers usually hard breach the Customs wall to Passport Check (main hard breach; only two soft walls left after the rework) from Passport Check. Vertical play comes through Security Room hatch (over Customs Inspection) and Security Room hatch (over Customs Desk). Strong picks here include Mute, Smoke, Azami and Mira.
- Valley push into Passport wall
- Detention wall opens Supply Corridor
- Reinforce both CCTV hatches
Breach walls
- Customs wall to Passport Check (main hard breach; only two soft walls left after the rework), from Passport Check.
- Detention outer wall, from outside (west/Parking side).
- Customs Desk wall to the Lobby entrance, from Central Lobby.
- Supply wall to Main Stairs, from Main Stairs.
Hatches and vertical play
- Security Room hatch (over Customs Inspection).
- Security Room hatch (over Customs Desk).
- 2F Security Room (CCTV) above Customs Inspection and Customs Desk, with two hatches. West Balcony / Central Stairs area above Supply Room.
Windows and outside play
- Detention outer wall (soft exterior wall).
- Passport Check side (Valley push).
- medium: attackers stage outside on the Valley/Passport side and the soft Detention outer wall. There is no balcony or rappel play onto this 1F site.
Rotations
- Customs Desk–Customs Inspection.
- Supply–Customs Inspection.
- Security Room hatches as defender drops.
Anchor spots
- Customs Desk behind the rotate.
- Supply back corner.
Flanks
- Main Stairs and Central Lobby; Detention side.
Best operators for Supply Room / Customs Inspection
Attack
- Thermite.
- Hibana.
- Ace.
- Twitch.
- Thatcher.
- Sledge.
- Buck.
Defense
- Kaid.
- Mira.
- Maestro.
- Bandit.
- Mute.
- Smoke.
- Goyo.
Picks that work here
- Mute: Strong anchor on Border.
- Smoke: Strong anchor on Border.
- Azami: Strong anchor on Border.
- Mira: Mirror on the box helps hold the Armory side.
Combos for this site
- Bandit + Wamai: Mag-NET guards the batteries.
- Kaid + Tubarão: Stacked wall denial.
- Kaid + Maestro: Hold the site together.
Sources
- Rainbow Six Wiki:
- liquipedia.net
- liquipedia.net
- siterep.gg
- r6coaching.com
- siege.gg
- PLEASE DON'T Reinforce THAT WALL! How To Setup and Defend BORDER All Sites - Rainbow Six Siege (alyttleton) at 5:19
- How to Set Up and Defend Border Like a Pro! - Rainbow Six Siege (R6Mint) at 16:47
- How The #1 Siege Team Solved Border (Fett) at 2:31
- How to Set Up and Defend Border Like a Pro! - Rainbow Six Siege (R6Mint) at 8:48
- How The #1 Siege Team Solved Border (Fett) at 2:13
- How to Set Up and Defend Border Like a Pro! - Rainbow Six Siege (R6Mint) at 8:31
- How to Set Up and Defend Border Like a Pro! - Rainbow Six Siege (R6Mint) at 63:15
- How To Defend EVERY Site in R6 (2026) (Athieno) at 39:52
- siterep.gg
- How Operators REALLY Work in R6 Siege X - Beginner Breakdown (Poxonlox) at 17:41
- The TOP 10 Operators in Y11S2 (Poxonlox) at 4:23
- How to Set Up and Defend Border Like a Pro! - Rainbow Six Siege (R6Mint) at 51:47
- siterep.gg
Other sites on Border
Armory Lockers / Archives Workshop / Ventilation Room Bathroom / Tellers